Blog |
|
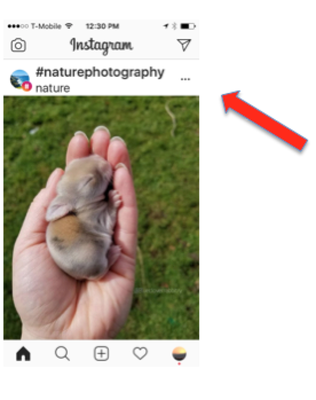
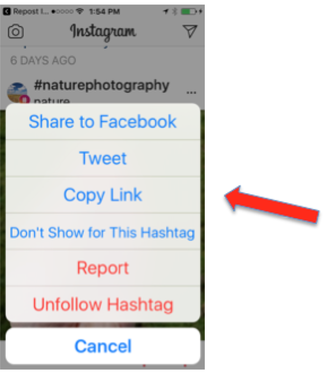
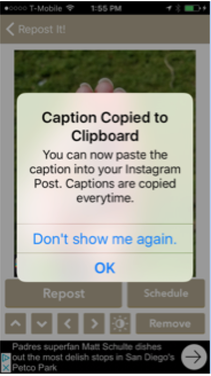
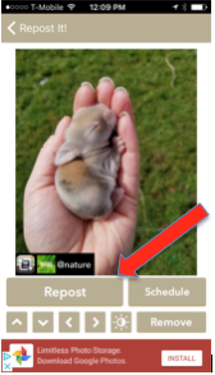
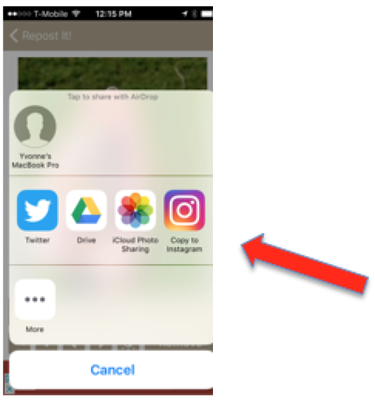
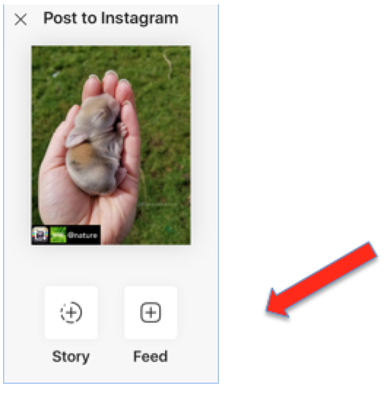
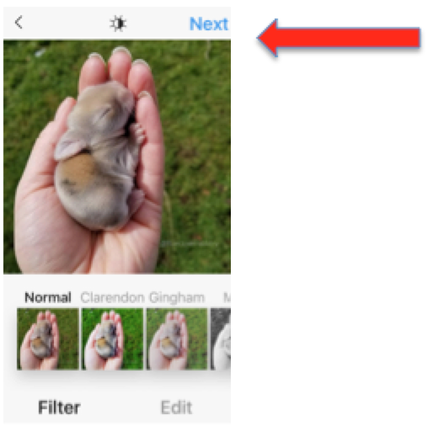
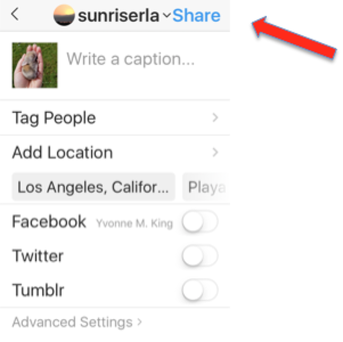
I wrote this post because I couldn’t find a step-by-step guide that clearly explained how to use the Repost It app and I wanted to save others the time it took me to figure it out. Let me know if you find it helpful. Cons: 1) Repost It is overrun by seemingly endless ads that pop up as you try to use it. Like anything that is “free,” it comes with strings attached. In this case, ads. 2) Repost It is also not as easy to use as shown in the deceptively simple instructional video. Pros: 1) Once you figure out how to use it, Repost It is a handy way to repost images on Instagram and give credit to the original poster. How To: It would be infinitely better if there were a share button on Instagram but until then, here’s my step-by-step guide on how to use Repost It for normal people – basically anyone not involved in the design of the app. You, of course, first have to download the app. One of the main things you need to know is that you cannot repost an image unless it is from a person or hashtag you’re already following. 1) Open the Repost It app 2) Open your feed in the Repost It app by clicking on the Instagram icon on the top right 3) Scroll through your feed and choose a photo to repost 4) Click on the 3 dots on the top right 5) Click on “copy link” 6) Return to Repost It 7) Then tap the photo and you’ll get a message that says “Caption Copied to Clipboard." Select OK. 8) Click on Repost 9) A menu will appear with options for Twitter, Google Drive, and Instagram, etc. Click on Copy to Instagram 10) The next screen will have the selected image and two choices below it that says “Story” and “Feed.” Choose Feed to repost. 11) Click “Next” on the Top left You’ll have the option to edit the photo, which I don’t recommend. You don’t want to alter someone else’s photo. Click “Next” again 12) Add your caption and tag the original poster Click “Share” at the top right to share to your story/feed You are done!
1 Comment
|
AuthorYvonne King ArchivesCategories |
Proudly powered by Weebly


 RSS Feed